For our group project, the 3D animation team were given a specific brief to work from, and asked to form a company name. The purpose of this brief was to emulate the experience of working in a small animation production company. We decided to name ourselves “A2D”. We were asked to create a 3D educational animation displaying the 12 principles of animation. We were also asked to treat our tutor Mike as if he were the client, and set up meetings and work with his feedback.
Initial Brainstorming Of Ideas
We created a discord group chat, a professional email address for our group, and then began brainstorming ideas/ suggestions. I tend not to really be the “idea person”, so I struggled to think of a plot or narrative. I had been thinking about different dog breeds, and toyed with the idea of animating different dogs that would each display a principle of animation. However I quickly abandoned this idea, because I realised it would require the modelling and animation of 12 character models- due to time constraints, this may not be feasible. One of the guys in the group linked videos of a Rube Goldberg Machine, which is a machine that uses different objects and actions to create a series of chain reactions. This seemed like an ideal concept for our group and the time constraints- it would not require complex modelling/ retopologised models. It was also a broad concept, allowing for lots of outside of the box thinking and creativity.
The brief specified that the completed animation would be hypothetically used for a BBC bitesized type purpose, and would be aimed at a demographic of teenagers studying animation. When thinking about this demographic, I suggested that we should take the angle of nostalgia, as this is a current trend in youtube animation, with the likes of Worthikids and Jack Stauber enjoying success in response to animations with a nostalgic aesthetic.
I also thought about how this demographic consumes content from tiktok, and how satisfying videos are very popular on tiktok. Chain reaction videos fall into the “oddly satisfying” theme.
Assignment Of Roles and Production Plans
Each team member’s strengths lie in different areas. For me personally, my strengths lie in modelling and texturing. However we each found ourselves working on varying aspects. After a few weeks, it became apparent that for one team member, who had not previously animated in any 3D software, learning either Blender or Maya within the production timeframe would not be feasible, so this member focused on 2D illustration and writing down feedback in our meetings with Mike. Myself and Joe are more experienced in Blender, whereas Dan and Phil are experienced in using Maya. We decided to work individually in both Blender and Maya, and then Joe would export the Maya animations into Blender using a process that I personally am not familiar with.
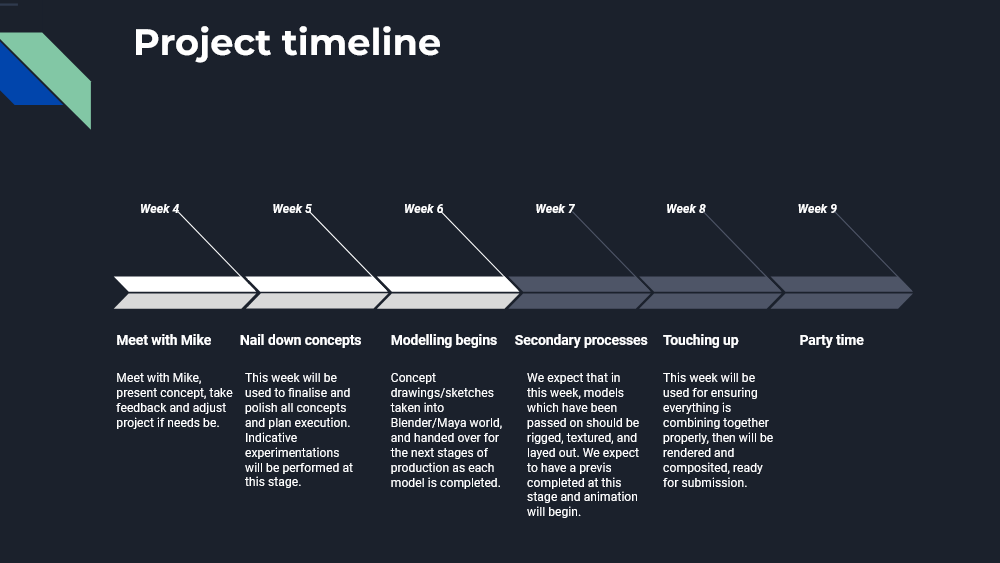
On week 3 we wrote up a production plan. This production plan changed a lot from the initial plan as time went by.
First Meeting With Mike After Coming Up With Our Concept
For our first meeting with Mike after we had our concept, we decided in advance which principle each one of us wanted to animate, and created proof of concept images. Our “main character” in the animation would be a ping pong ball, which would move along a track and set off different events. I personally wanted to animate the principles “Appeal” and “Secondary Action”. I had the idea of showing appeal by having the ball roll off a track onto the floor, sprout feminine arms and legs and dance. The shapely character would then display “Secondary Action” by continuing to dance whilst picking up a lit torch and swinging it around. It would then light the wick of a cannon.

After explaining this idea to Mike, he suggested that this may not be the best idea, as it was incredibly surreal in comparison to the other chain reaction scenes and may not fit with the overall tone of the animation. He also pointed out that animating this would take a long time, and would require a fair bit of rigging.
After considering this feedback, I agreed with what Mike was saying. I was a bit disappointed because I really wanted to avail of the mocap technology in the animation studio on campus for this character’s movements. However, I did agree with the points he made, so I began brainstorming again. I was watching Toy Story because Phil and Joe mentioned to me about the fishing rod character with the barbie doll legs, and that maybe we could model a character similar to that.

However, even though this character is literally just a fishing rod with doll legs, the fact it comes to life and moves autonomously is still an issue in terms of the unrealistic tone shift. It was important to me that my “appealing character” was rooted in reality, in the same way that the rest of the animated objects would be. Then I noticed this wind up toy from Toy Story:

I really liked his colours and his big eyes, he definitely has a lot of appeal. I then came up with the concept of a wind up walking egg cup type toy, which the ball would bounce into.

Development Of Tasks
After a few weeks, it became apparent that we would need to divide up our tasks again, as (previously mentioned) Jay would not be able to learn how to animate in Blender within the timeframe. I then agreed to animate his scene, which would display the principles “Anticipation” and “Exaggeration”. He already came up with the concept of a cannon shooting out a ball to show these principles, and Phil had already modelled the toy cannon.


We sectioned out the 12 principles into 4 scenes, which made it easier for each of us to be responsible for modelling and animating a scene individually.
Development Of My Scene
Now that I had a scene to work on as an individual, I began thinking about how I would display the principle of “secondary action”. I came up with the idea of making it look as though a match stick had been taped to the wind up toy, which would then scrape against the striking surface of a match box, igniting the flame. This flame would then light the wick of the cannon, which would be long in length and spell out the word “anticipation”. Then the cannon would fire. Below is the first rough animatic for that series of events, which I showed to Mike in a meeting with him, along with the rest of the group’s scene animatics.
This animatic features a basic placeholder cannon modelled by me (I couldn’t find Phil’s model in the one drive that day, and I realised afterwards that he had uploaded the actual maya file, not a .OBJ or .FBX Model file, so I was looking for the wrong thing!). The wick on the cannon was also a basic placeholder model, simply for proof of concept. The toy, match and matchbox were modelled by me however.
Later, Joe provided me with his blender file which had Phil’s model of the cannon along with his model of the “Anticipation” wick. We decided in a group meeting that it would make more sense for the wick to be coiled up on the ground, as this is more natural looking. Joe also was working on making the wick appear as though it were burning, and at this stage he had not fully overcome the issue of how it flowed along the mesh.
“Getting Lost In The Sauce”
In a group meeting, Dan raised his concerns that my scene didn’t really display secondary action, and he suggested that my wind up toy may need extra limbs with more movement. Joe descibed this as “getting lost in the sauce”- getting so wound up in a concept, that you forget what it is you’re trying to do! I really like that phrase, and I completely agreed. He and Joe also said that the camera does not get enough time to focus on the appeal of the wind up toy. I agreed with both points! I decided to add lego style arms to my wind up toy, which could then move back and forth whilst holding the match stick, more clearly displaying “secondary action”. I also extended the walk cycle of the wind up toy, and placed the camera to focus on the wind up toy for longer.


I created a table model and textured it to look like wood in Substance Painter. This replaced the track which the ball rolls along in the animatic we showed to Mike on the 11th of April. I also added a hand (provided by Joe) into the sequence for the sake of realism- the wind up toy is already walking as the ball rolls and falls into it, but in terms of continuity, how did the wind up toy get there?
As Phil had already animated the same hand model to flick the ball at the beginning of the animation, I thought that it would make sense for the hand to also be present in the scene I was working on.
I showed this to Mike, and he was happy that I had considered this issue, but he wasn’t satisfied with the presence of the hand in this particular scene. He asked me to find another solution, and I did by making a model of a claw arm. In terms of character, if the person or entity who set up this whole chain reaction could be creative enough to set up all these pieces together and time everything so that the ball travels flawlessly, perhaps it’s not unreasonable that this person could set up a small machine which would release the wind up toy at the exact right moment?
Focussing on Texturing
After I had modelled and animated the parts I could, Joe took over my scene to put the flames on the match stick, fix the “anticipation” fuse animation, and add Phil’s animation of the cannon.
Myself and the group agreed that I should focus on creating textures for various objects in other scenes. I textured the following objects:


Everything Else
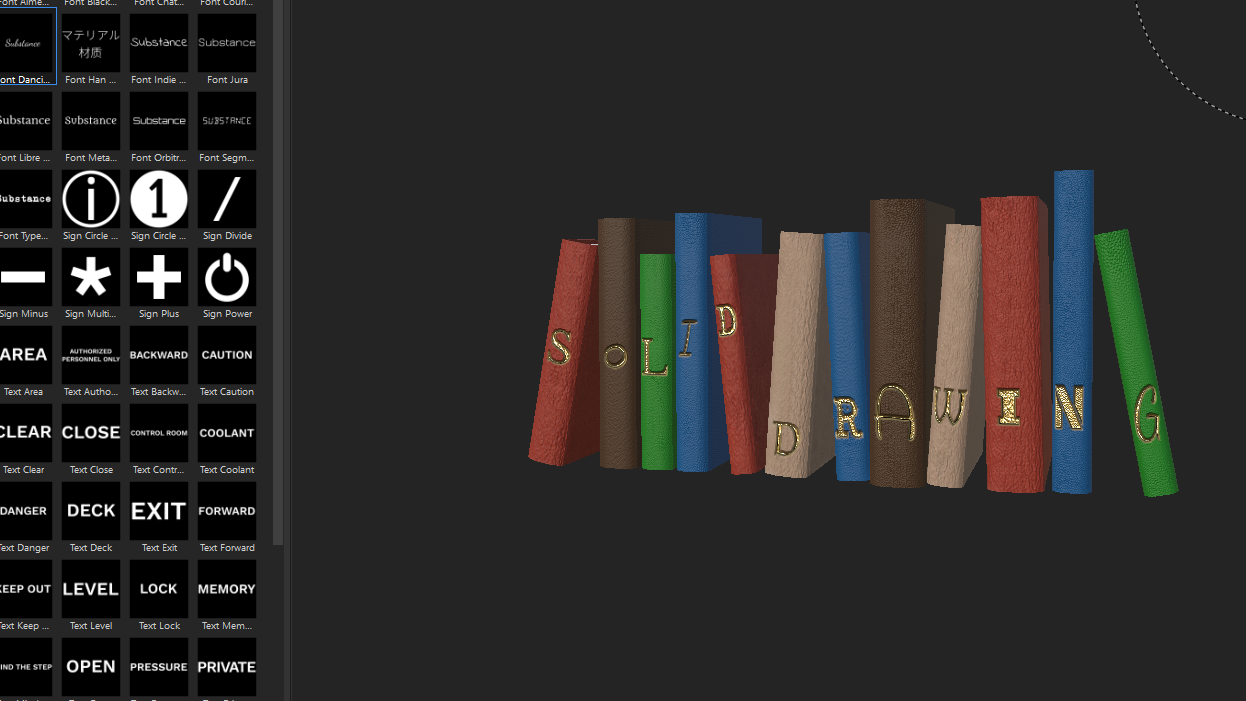
Below are various images showing the UV’s and textures of everything I personally modelled and textured for use in building up the set.


Neon Lights Intro
The last thing we were missing was a title screen/intro. Joe suggested a model of neon lights spelling out the title, “The 12 Principles of Animation”. I offered to make this neon sign, as both Joe and I follow The Blender Guru on youtube and were both aware of his tutorial for this particular model.
I followed the tutorials and came up with a suitable model. Joe explained to me how to animate it so it would look as though the light was blinking off and on by turning the emission strength from high to zero and adding keyframes.


Conclusion
This was my fist time working on animation in a group, and it was certainly a learning experience! There were several bumps in the road; some members caught covid at different stages, I developed tonsilitis, and one member was so sick at one stage that he was nearly hospitalised. These occurences could not be helped, and we did communicate online as best as we could- we talked over zoom and discord voice chat. However I found that it was much easier to communicate and to delegate tasks to each other when we spoke in person. If I was to go back in time and do it again, I think I would focus on putting more thought into the planning stage and get the ideas nailed down as quickly as possible. However with that being said, I’m still really happy with what we produced as a group, and I’m happy I got to learn so much from my group members! Joe knows things about blender that I had not learned yet, I’ve definitely learned a lot about rendering from him, and I’ve learned a lot about Maya from seeing Phil and Dan work together. I really appreciated the hard work that my group members put into the project!
In terms of my own contribution, I’m happy with what I was able to do but I think I may have gotten a little too caught up in my own process of modelling and UV unwrapping in Blender, and texturing in Substance Painter. I’m very used to this way of doing things because for the last year and a half I’ve focussed on making models for use in games. When I look back on some of the more simple models I made, for example the feet on the wind up toy, I could have saved time by just adding a shiny plastic looking material to the object in blender without doing much UV unwrapping- this would have been fine. But again, it’s all about the learning process, and I definitely feel that I’ve learned a lot working on this project.
